Showing posts with label DIY. Show all posts

Friday, October 19, 2012

Maps, Rulers and a Door


Day #19 of 31 Days of Storytelling

Late this summer my husband and I saw a bunch of doors on the side of the road with a big FREE sign on them.

You don't have to send me a formal invitation.

I'm in!

But we were in my husband's sedan without the capability to haul anything.

So I sent him back with my car.

The door he picked was a sliding closet door with no hole for a door knob.

Awesome!

It was painted white on one side and had a very light stain on the other.

I knew I wanted to stain it dark.

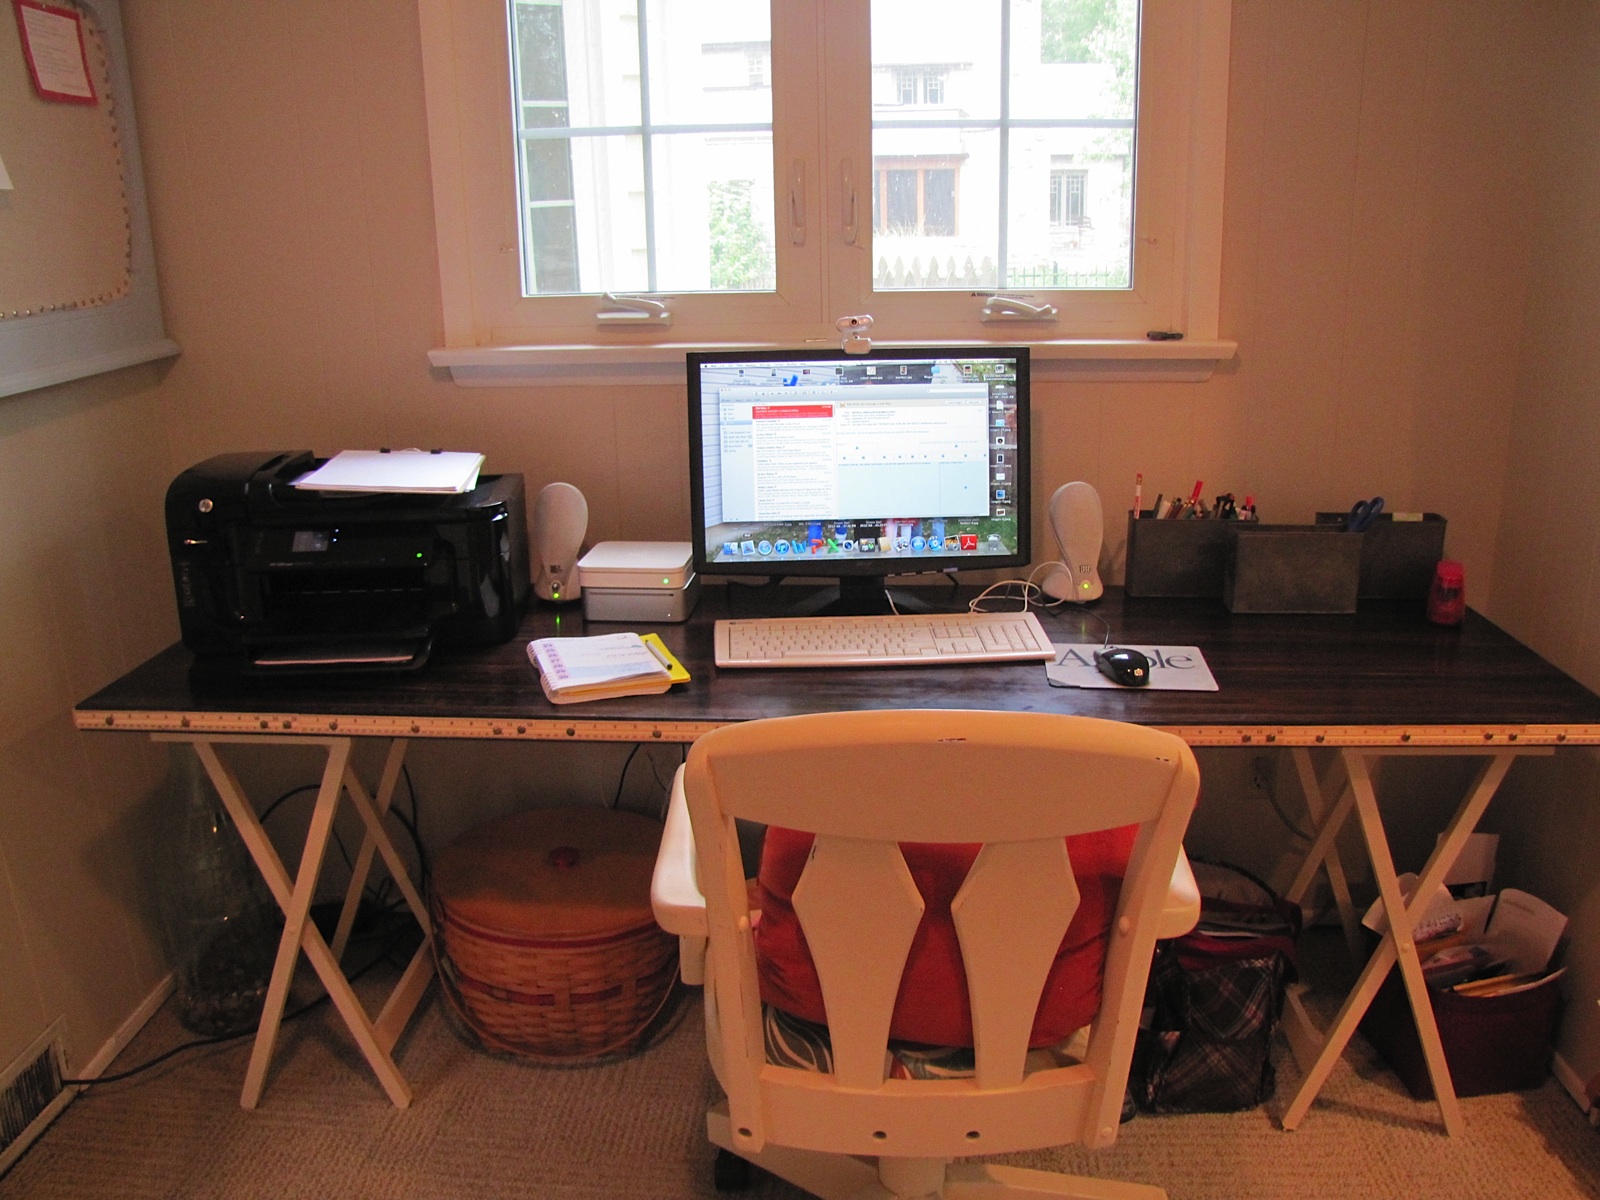
With the help of Pinterest, I found that wooden sawhorses would make great legs.

But sturdy ones were expensive.

I couldn't take a FREE door and blow it with expensive legs.

I found some solid wooden snack tray tables at a thrift store for $3 a piece.

Monte attached the door to the tables with screws.

The before picture. See the light stain?


Now the fun began.

Sanding (which I just love to do!)

And painting.

I mixed my own cream colored chalk paint
for the legs.
I couldn't get all the white paint off the edges of part of the door so it didn't accept the stain well and streaked.

Yuck.


I love the way the stain looks on the top.

All done. I added rulers to the edges with
hot glue and upholstery tacks to cover the streaks.


It isn't perfect. But it cost less than $20 once I got the rulers.


So now I was ready to concentrate on the other side of the room. 

I have been wanting to back the bookshelves with maps for awhile.

But I didn't want it to be permanent. 


So I took out the shelves and tacked the maps up with 3M poster adhesive that is removable like their other products.


The hardest part was trying to figure out which maps to use where.

Half-way done.


I spent $20 on maps.

Wait.

Did I really spend more on maps then I did on the entire desk?

Friday, October 12, 2012

From End Table to Bedside Table

Day #12 of 31 Days of Storytelling

A year ago my girlfriend gave me this fantastic end table

(thanks, Beth!) 

that had been given to her by her husband's grandmother.

I knew RIGHT AWAY what I wanted to do with it.

But I let it sit in my garage for almost a year before I did anything with it.

I could give you many excuses why.

Like, I needed my dad's help and he lives 4 hours away.

Like, It was starting to get cold and spray paint doesn't like cold weather.

Like, I just showered and I don't want to get dirty.

But I won't.

Let's just say, I didn't get to it until later.

Nigel posing with the table.


When Beth gave it to me it was a low end table height with short legs.

Sorry. I didn't take pictures of it in its original form. Think 1970s.

I had my dad make longer legs so it could become a bedside table.


This table is solid and HEAVY.

I knew I wanted the table to be red.

I bought Monte a red bedside table at a flea market a few years ago and I have been

just 
downright 
jealous of it.

Love all the storage space. Don't love how I didn't wipe all
the dust off before I took this picture.
I am an avid reader and needed a table with lots of storage for my books. This one has it.

Look at these beauties.

I decided to go the easy route and spray painted the whole thing with a primer first (since the legs were raw wood).


I chose a glossy red spray paint. (It took a few cans.)


And a hammered bronze for the handles.

I sprayed a protective coat just on the top (since I always bring a glass of water with me to bed.)

I LOVE it!

And I am NO LONGER jealous of Monte's bedside table.

Mine is bigger.


Tuesday, June 05, 2012

Spoon RIver

I keep humming "Moon River" when thinking about writing this post about this wreath.

Spoon, moon--that's how my mind works.


Yep, it is made out of plastic spoons. I love using things around the house for crafts. 

One day I will show you all the wreaths I have made from things found in my pantry. 

[The teenage girl that lives next door thinks I have a problem. Like a Strange Addiction level of a problem. ]


I saw a few spoon wreaths done a few different ways online, but mostly I did my own thing.

Here is what I used to make this:

•Cheap white plastic spoons (2 boxes of 48 and then a few extras)
•Cardboard cut into a circle (to glue spoons to)
•Hot glue gun
•Yellow and black paint
•Ribbon

I started out with the cheapest white plastic spoons I could find at Kroger. They came in a box of 48. I used 2 boxes and then a few other spoons I found loose in my pantry. I had to seek them out because I broke a few spoons. 

You see, you have to remove the handle from the spoon. At first, I tried cutting it with scissors. It worked. 

For a little while. 

Then it shattered a few and I decided to just snap the handles off by hand. 

And snap it did. So much so that my family complained they couldn't hear the TV. 

Much better.

I started gluing the spoons on the outer edge of the cardboard circle leaving a spoon's width between each spoon. That is so a Chrysanthemum-like petal effect could happen. 

Don't you just love that children's book, "Chrysanthemum" by Kevin Henkes?

 I love the way her name was always said three times. 

"Chrysanthemum, Chrysanthemum, Chrysanthemum!" 

Which makes me say it three times whenever that word ever comes up. 

Whew! Do you know how hard it is to correctly type/spell Chrysanthemum as many times as I just did just now?!

Moving on.

Keep gluing the spoons row by row until they form a center.


I really liked the flower white. It was pretty. Regal even. Especially if I added a bedazzled jewel of some sort in the center. 

But it is summer and I am ready for COLOR! 

Maybe for another season I will make another one and keep it white.


So, as you can guess, I decided to paint the flower. I decided to go with yellow. I really think spray paint would've been WAY easier for this project IF I didn't want a separate color for the middle (imagine all the taping off I'd have to do!)

So I painted each spoon using a little paint brush and my iPod for entertainment. 


I soon realized that it was easier to paint once I elevated the wreath on a glass. 


The paint didn't want to adhere to the plastic with one coat. Grrrr.


Something isn't right.


Still not.


Better. (But it is hard to know when to stop painting.)


After a second coat of paint, I hot glued a little piece of ribbon to the back of the cardboard and hung it on a suction cup hanger on my favorite mirror. It was my grandmother's.


But I like it on my side door better. 

More sunflower than Chrysanthemum now but I still like it.

**UPDATE**
I decided to paint the sunflower red. I wanted it to look like a gerber daisy but now that it is the Christmas season, it is looking quite Poinsettia-like.

I used the spray paint that is made for plastic. It went on like a DREAM compared to hand painting each spoon.


My friend's daughter found this big diamond-like jewel on the floor of church one Sunday this summer and thought to give it to me.

It was perfect for the center of this new red spoon flower wreath.


Makes me wonder what that big jewel's original purpose was.

Friday, June 01, 2012

Ruler of All Rulers

Over the past year I have seen a few large rulers on Pinterest and saved them in my ever-growing file of projects I'd like to do (or have my dad make). The big ruler was one of them.


Since my dad lives in another state 4 hours away, I can't just run to his house with my requests on any sort of regular basis.

But that would be AWESOME.

I showed him a picture of the big ruler I had seen and he immediately measured my baseboards.

That is key. 

If you want the ruler to be a true and accurate growth chart, you have to know your baseboard height so you can start your hash marks considering the measurement starts at the floor.

Are you following me?

Because I think I got lost for a second and I was the one talking (or typing).

My dad used a piece of poplar 3/4 inches thick, just over 7 inches wide and 6 1/2 feet tall. He put a light stain on it. He measured and marked off the hash marks with a pencil. I went over it with a black paint pen. I used Word to print out large numbers in a font I liked. It was a typewriter font. I cut out each number with an exacto knife and traced them onto the ruler with a pencil. I filled in the numbers with the paint pen.

That's my dog Nigel. His head cocked like that makes me smile. 

It took no time.

Seriously.

But then I decided I wanted the ruler to be darker. My dad suggested shoe polish to deepen the color and it worked beautifully. The waxy stuff in the round tin didn't work nearly as well as the bottled stuff with the sponge tip.

Who still polishes their shoes?

I like the inconsistent coverage of the shoe polish. 

The trickiest part was trying to figure out where to put it and how to hang it. We tried to use picture hangers on the back but realized the board was warped.

So we just leaned it against the wall for awhile.

It looked good. 

But we couldn't get accurate height measurements.

People loved it. 

So I had my dad make two more for friends.

He's good like that.

By the time he came over again, the ruler was still leaning against the wall looking good but acting like a poor growth chart. So I had him figure out how to hang it. He used screws and anchors making sure it was being drilled into the wall's stud (which is difficult when you have plaster walls like ours. Stud finders do NOT work!) That is why our ruler isn't centered on the small wall, we had to use the stud we could find.

We can't find the paint from the kitchen to cover those patch marks. [Sigh]


I will tell you about the chalkboard door soon. 


It has become a fun conversation piece for our kitchen. Especially for our oldest daughter who is checking daily if she is yet 6 feet.


Almost. She is 5' 11 1/2"

(We know this because we have THE RULER OF ALL RULERS)

Almost 5 feet.


Even adults measure themselves. It's fun.

I think I have shrunk.

Not fun. 

If you'd like a ruler and live in the Columbus, Ohio area, leave a comment and my dad will make you one.

At $30, it is a steal!

Okay, just for fun, let's compare:


<---   Ruler from Pinterest. 


Ruler of All Rulers -->

Burning Down

The other day I was listening to the podcast The Next Right Thing. It was the episode titled Reflection as Activism.  Emily P. Freeman said ...